
IPhone6S screen replacement_mobile phone repair graphic tutorials
Detailed steps to change the screen of iPhone6S.
Method/Step
Repairing your device may cause damage to the device and loss of data. Before starting the repair, please make sure that your phone has been backed up.
- Backup via Itunes ----
(1) Connect your device to the computer, open Itunes, select your device at the top right of the computer, and select Start backup now in the backup window. Backup via Itunes----
(2) Make sure your mobile phone is connected to Wifi, follow the steps below: Settings-Icloud-Storage & Backup, click Start Backup.
2. Kingsdun recommends to relax and give yourself 1-2 hours to repair your phone, be patient, most of the mistakes are caused by the gentleness caused by panic, remember that you are operating these fragile parts, plan carefully, and pay attention to the screws and disassembled devices. Accessories When you start to repair, separate the removed parts and place them in a small container or on a clean and smooth object.

3. A little bit of attention, take a closer look.

4. Shutdown --Note: If the screen is not functioning normally, you can press and hold the power button and the return button at the same time until the shutdown dialog box appears on the screen and then let go. PS: Although it is okay not to shut down, but in order to minimize the loss, there is no need to steal this laziness.

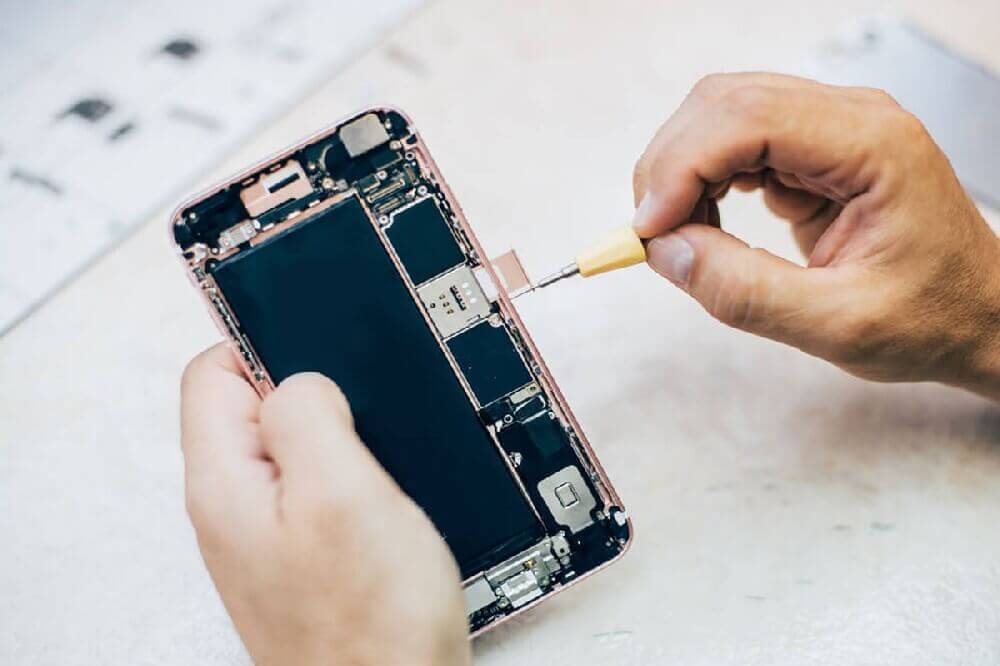
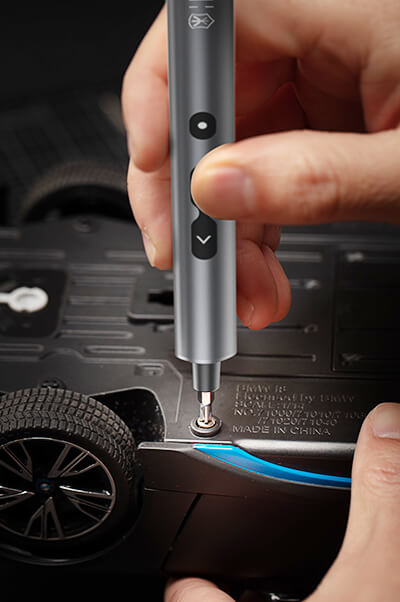
5. Remove the 2 pentagonal screws next to the charging port. PS: Do not use the wrong screwdriver. Using the wrong screwdriver will cause the screws to slip.

6. Use a hair dryer (air gun if possible) to properly heat the edge of the phone. PS: 6S adds waterproof glue inside (although it has little effect), heating is to soften the glue and facilitate disassembly.

7. Place a suction cup above the return button, gently pull up a gap, and then insert your nail into the gap. PS: If the screen is broken, you can stick a piece of tape on the screen.

8. Then insert the triangular piece into the gap, and use the triangular piece to cut along the periphery.

9. There is a flat cable connection between the display screen assembly and the middle frame assembly.
10. To reduce damage, cut off the power first. Use a Phillips screwdriver to remove the fixed Phillips screw on the battery buckle. PS: Remember to use the screwdriver correctly. PS: It is recommended to put the screws on the corresponding position on the magnetic memory pad to facilitate memory. The next steps will be mentioned.

11. Using the flat end of the mobile phone spudger, slowly hold up the battery connector and remove it. (Note: Be careful to pry up the battery connector, do not pry up the fixing slot of the battery connector by mistake, you will damage the battery connector if you misuse it.)

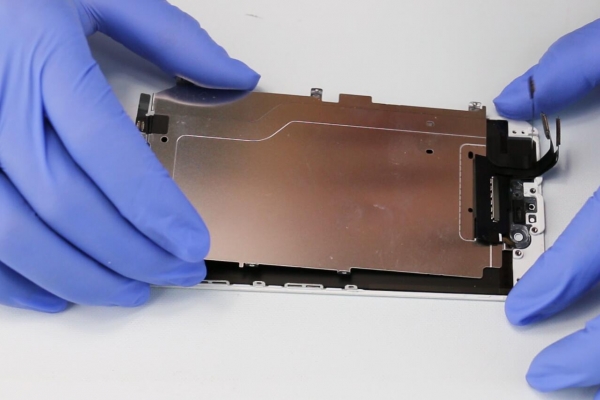
12. Remove the Phillips screws fixing the EMI (electromagnetic shielding) cover on the motherboard, and then remove the electromagnetic shielding metal plate. (Note: Turn counterclockwise to remove the screws, but it should be noted that the two screws on the lower end are smaller than the upper end, and the force is moderate.)
13. In order to prevent damage to the accessories caused by wrong screws during installation, it is recommended that novice friends use memory pads. PS: The internal structure of Apple's mobile phone is still carefully designed. The size of the distributed screws varies according to demand. Therefore, do not install the screws randomly, otherwise it will damage some accessories.

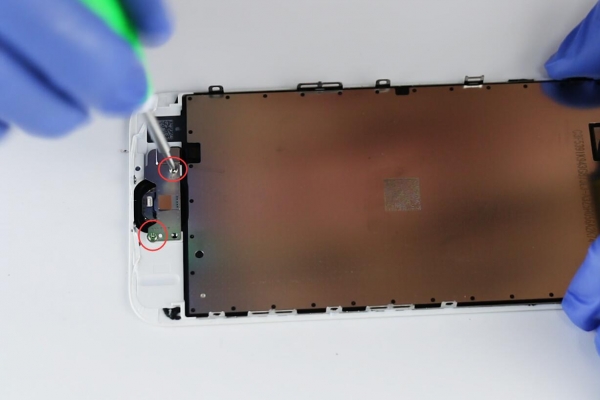
14. Use the tip of a mobile phone spudger to remove the cable here. PS: Just apply lightly. Although the cable is well made, it is still fragile after all. Don't cry if you break it too hard. Xiaoyu is not comforting.

15.OK, successfully separated the display assembly.

16. In order to prevent quality problems with the purchased display, do not open the package, first test whether the display is normal. As shown in the figure, connect the display cable and the battery cable.

17. Check the function of the display screen, touch, and display problems, whether there is light leakage or dead pixels.

18. If everything is normal, please disconnect the battery cable connection and the display cable connection. And put the display aside and wait for it to be installed later.

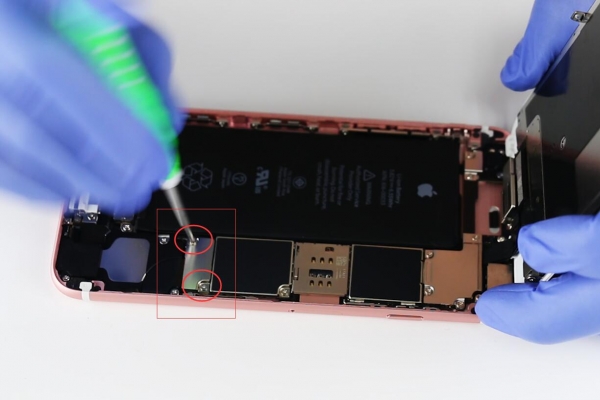
19. Back to the old display assembly, remove the Phillips screw of the handset fixing bracket, and remove the handset fixing bracket. PS: All the removed items will be installed on the new screen later, please keep them properly and place the screws correctly on the corresponding positions of the magnetic screw memory pad.

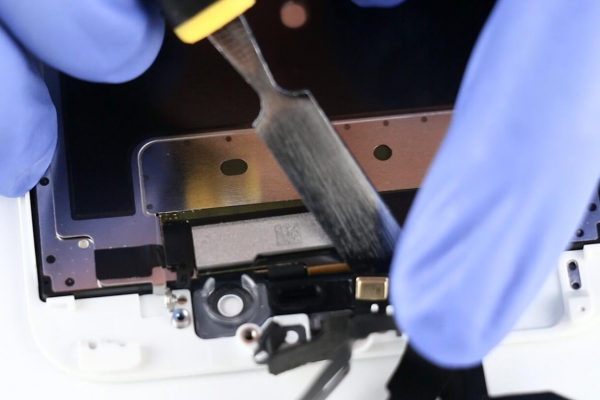
20. Remove the handset.
21. Remove the front camera cable. PS: If the glue of the cable is too tight, you can use a hair dryer to heat it properly, so that it can be removed more easily.

22. Remove the fixing screws on the back cover of the LCD assembly. PS: There are more screws, so don't remove them less.

23. Then lift the iron sheet of the LCD assembly, don't worry, continue to look down.

24. There are glue sticks on the LCD assembly bracket, both inside and outside. The external picture is not shown, you can see it.
25.OK, remove the screws on the return key iron sheet, and remove the return key iron sheet.

26. Shovel down the return button cable, remember to be gentle. Shovel the cable, you will lose your beloved fingerprint function.

27. Then use your fingers to pull it off. PS: The picture is not very clear, Xiaoyu apologizes here.

28. After all was removed, the installation started. After tearing off the protective film on the new screen, install the return button. And install the return key iron piece together. PS: How to disassemble and install, don't install the wrong screws.

29. Install the iron sheet of the LCD assembly. PS: Buckle this in.

30. Then install the Phillips fixing screws. PS: There are a lot of screws, don't worry.

31. Install the front camera cable. PS: How to disassemble and install, the position must be accurate.

32. Install the handset. PS: Align the screw holes.
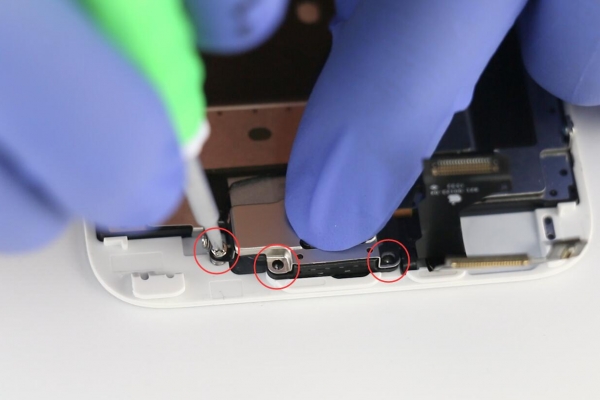
33. Install the earpiece fixing bracket and install the fixing screws.

34. Paste waterproof glue. PS: Align the position.

35. After pasting, please tear off the protective film.

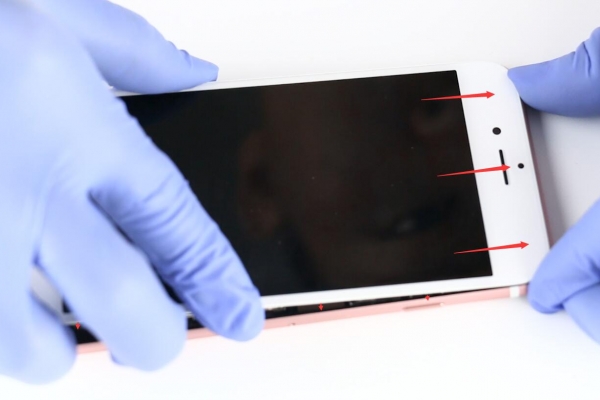
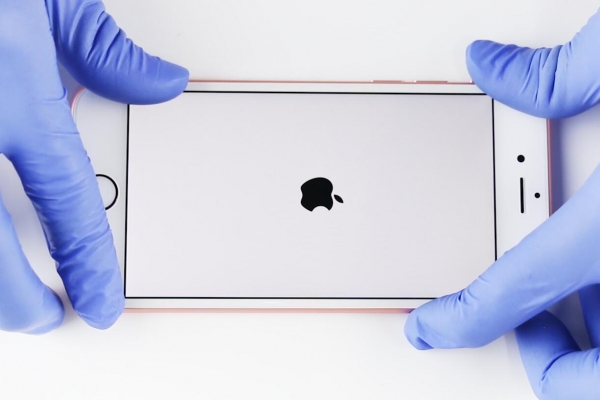
36.OK, the gadget is installed on the new screen. The following is installed on the middle frame assembly and connected to the flat cable. If it is connected correctly, a slight noise can be heard. If there is no sound, it may not be buckled properly, please remove it and buckle again.
37. Then connect the battery cable.

38. Lay the phone flat, turn it on to test whether the phone is normal, and check the function. --Display situation --Touch situation --Camera --Handset --Photosensitive --Speaker --Volume key --Recording function --Power key 1: If there is no problem in the function test, then shut down. 2: If the function is not normal, the cable may not be inserted properly, remove the screen, disconnect the power supply, and recheck the cable function.

39. After confirming that there is no problem, install and fix the EMI (electromagnetic shielding) cover and the screws on it. PS: The screws here are very important, you must strictly follow the screws at the corresponding positions on the memory pad.

40. Install the battery buckle iron plate, which has the fixing screws on it.
41. Close the screen and gently push it in the direction of the arrow, and then buckle it down. PS: If it cannot be combined normally, please check whether there is a foreign body stuck or the accessories are not installed correctly.

42. Install the last two pentagonal screws. PS: Restrain the excitement.
43.OK, the replacement is complete! Turn it on to see if there are any problems. Xiaoyu was joyful at the moment, and found that writing posts became more proficient. It's not easy to write a post, so don't spray it. Scattered flowers, Xiaoyu thanked you here.
End
tool
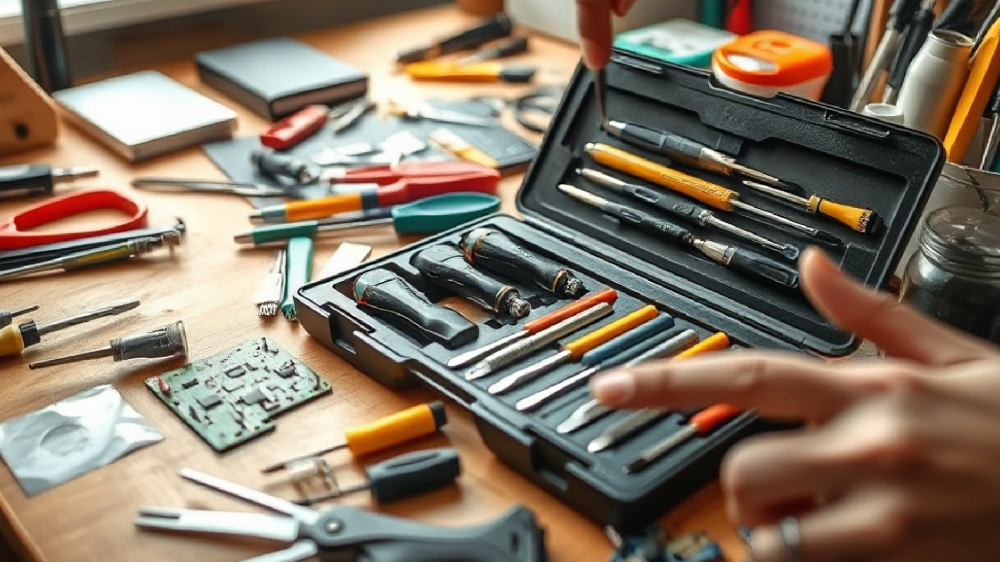
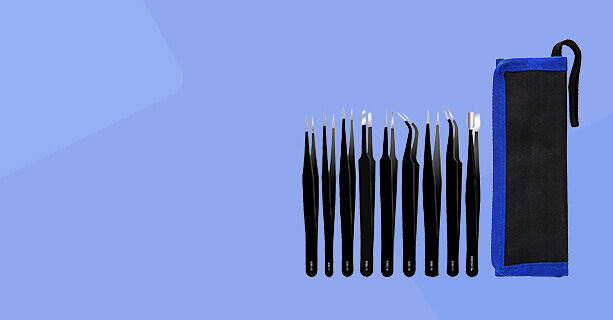
Kingsdun’s exclusive tool kit for iPhone6S. PS: Apple’s wonderful designer has added a special screw.
Precautions
IPhone6S screen replacement_mobile phone repair graphic tutorial has ended. It is risky to change the screen, friends with poor hands-on ability, please do not disassemble and replace the phone without authorization, so as not to damage the phone
If you are looking for a professional screwdriver manufacturerto customize your precision screwdriver set, feel free to contact us today! We provide high-quality, customizable toolsfor various repair needs.


Most Popular Posts


BECOME A WHOLESALE PARTNER
Get 10% off on orders over 500 units. We offer exclusive B2B pricing, OEM packaging, mixed batch support, and fast global delivery. Partner with a trusted screwdriver manufacturer to boost your margins.